

Last Updated: November 1, 2026
Quick Summary
To maintain ceramic grill grates properly, preheat the grill, brush off residue while warm, and clean with steam, warm water and a little dish soap rather than metal scrapers. Rinse, dry completely, and inspect the coating regularly to catch chips or cracks early.
- Preheat the grill on medium-high for about 15 minutes to loosen baked-on food.
- Avoid metal scrapers and stiff wire brushes, which can chip the enamel coating.
- Steam cleaning lifts grease without harsh chemicals and requires no bucket.
- Never pour cold water on a hot grate, since sudden temperature change can crack the coating.
- Dry grates completely after cleaning, because leftover moisture is a main cause of rust.
Table of Contents
- Why Ceramic Grill Grates Need Different Care
- Step 1: Preheat and Burn Off Residue Before Brushing
- Step 2: Choose a Safe Brush or Bristle-Free Scrubber
- Step 3: Clean with Steam, Warm Water and Soap
- Step 4: How to Clean Porcelain-Coated Grates Without Damage
- Step 5: Rinse, Dry and Protect Against Rust
- How Often to Clean Grill Grates by Use and Season
- Troubleshooting Chips, Rust and Stubborn Residue
- Frequently Asked Questions
Why Ceramic Grill Grates Need Different Care
Ceramic grill grates need gentler handling than cast iron or steel. The enamel coating can chip or crack under hard scraping, and that damage is hard to undo. Knowing what your grates are made of is the first step to cleaning them well.
Grill Daddy Brush Company builds steam-cleaning tools for all kinds of grates. Our brushes are suitable for stainless steel, ceramic, and cast iron grates, but the way you use them matters. The steps below show you how to keep your grates clean without wearing down the surface.
Here is what usually goes wrong with ceramic grates:
- Wire brushes scratch the coating and leave metal exposed
- Heavy scraping chips the enamel at the edges
- Harsh degreasers can dull the finish over time
- Grates left wet rust faster once the coating is damaged
Watch out: Never heat an empty ceramic grate to high temperatures and then hit it with cold water. The sudden temperature change can crack the coating.
Step 1: Preheat and Burn Off Residue Before Brushing
Start by preheating the grill on medium-high for about 15 minutes. This loosens baked-on food and grease so it lifts off more easily. Close the lid and let the heat do most of the work.
Then, while the grates are still warm, brush off the loose debris. Warm residue comes away far more easily than residue that has cooled and hardened.
Step 2: Choose a Safe Brush or Bristle-Free Scrubber
Both bristle brushes and bristle-free scrubbers can clean ceramic grates safely. The right choice depends on how you like to clean and how much you worry about loose wire.
- Bristle brushes: Our stainless steel bristle brushes are a good fit if you want a classic brush feel.
- Bristle-free scrubbers: These use a coarse Aramid fiber pad instead of wire. They suit anyone who wants to avoid loose bristles entirely.
Both options clean effectively. Choose the one you are most comfortable using. You can find the NEW Grill Daddy Pro with Bristleless Grill Scrubber if you prefer a bristle-free option built for steam cleaning.

Step 3: Clean with Steam, Warm Water and Soap
Steam cleaning lifts grease from ceramic grates without harsh chemicals. Fill your Grill Daddy with water, heat the grill, turn on the water valve, and scrub. There is no bucket and very little mess.
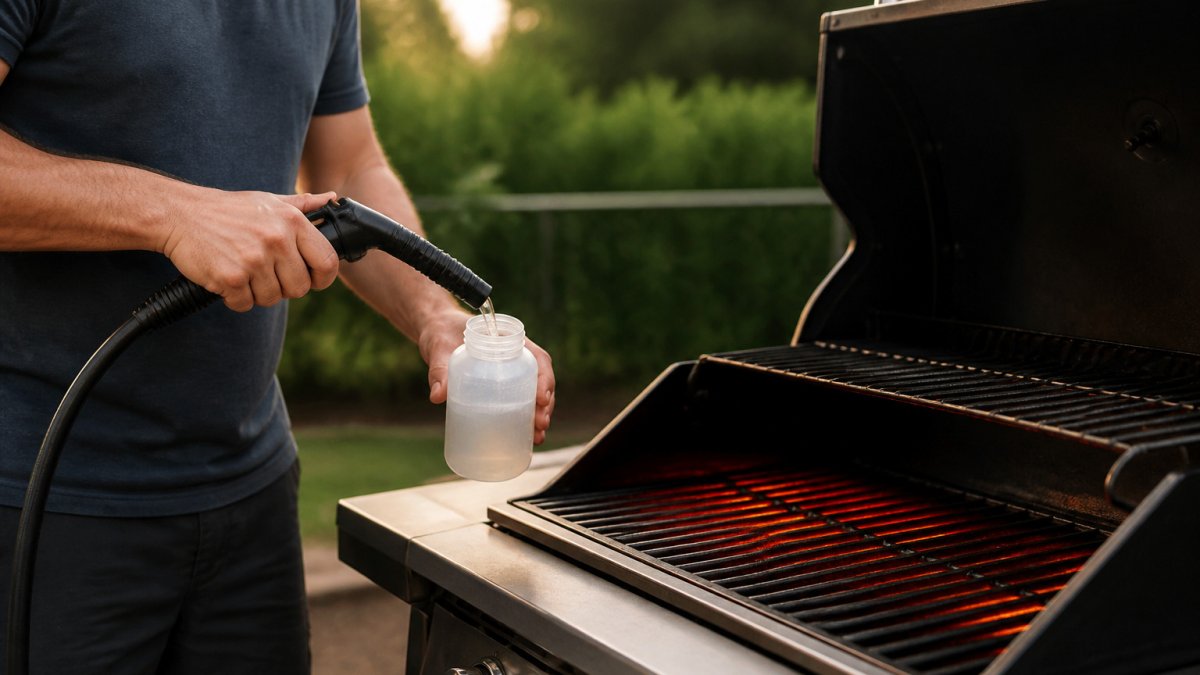
Work in short passes and let the steam sit on stubborn spots for a few seconds. For tougher buildup, a small drop of dish soap in warm water helps. Rinse the grates afterward with clean water. You can get the Grill Daddy® Pro - Authentic Steam Grill Brush to handle this process.

Step 4: How to Clean Porcelain-Coated Grates Without Damage
Porcelain-enamel and ceramic-coated grates are not bare metal. The coating is a glass-like layer fused to a steel core, and it fails differently than cast iron or stainless steel does. Understanding that difference is what separates a grate that lasts for years from one that chips within a season.
How the coating fails:
- Chipping happens when a hard tool, a metal scraper, a stiff wire brush pressed hard, or a dropped grate, strikes the enamel and knocks a piece off, exposing the steel underneath.
- Cracking and crazing come from thermal shock: rapid heating or cooling that makes the coating and the steel core expand or contract at different rates. Hairline cracks let moisture reach the core, which then rusts from the inside.
- Dulling and staining come from abrasive pads, oven-style degreasers, and acidic cleaners that etch the glossy finish over time. The grate still works, but the surface gets rougher and holds residue more easily.
Temperature rules that protect the coating:
- Never put a cold, wet grate onto a hot grill, and never pour cold water on a hot grate. Let grates come up to temperature gradually with the lid closed.
- Do not run a ceramic grate through a self-cleaning oven cycle or a dishwasher. Both expose the coating to temperature swings and detergents it was not designed for.
- After cooking, let the grate cool to warm, not cold, not blazing, before scrubbing. Warm residue lifts; cold residue fights back; a red-hot grate plus a wet brush is how cracks start.
Tools and cleaners to avoid on coated grates:
- Metal scrapers, putty knives, and stiff wire wheels pressed hard against the surface
- Abrasive scouring pads and powdered cleansers
- Oven cleaner and other caustic degreasers
- Acidic cleaners left to sit on the coating
What to use instead: steam, warm water, a small amount of dish soap, and a brush or scrubber you control the pressure with. Steam lifts grease without abrasion, so the coating never has to be scraped. Work in short passes, keep the tool moving, and let the steam do the loosening rather than your arm.
Check your manual first. Care instructions and warranty terms vary by grill and grate model. Some manufacturers specify a maximum cleaning temperature or prohibit certain cleaners, and using the wrong method can void coverage on the grates. Before you reach for any abrasive, chemical, or high-heat method, confirm what your grill's manual allows.
Step 5: Rinse, Dry and Protect Against Rust
After cleaning, rinse the grates with clean water to remove any soap. Then dry them completely before the next cook. Leftover moisture is one of the main causes of rust.
You can keep the grates in good shape by leaving the grill on for a few minutes to dry them out. A thin coat of cooking oil on the grates after they dry can also help protect against rust. For a bristle-free option that is easy to replace, consider the Bristle Free Mess Free Aramid Replacement Scrubber.
NEW Grill Daddy Pro with Bristleless Grill Scrubber →

How Often to Clean Grill Grates by Use and Season
How often you clean depends on how much you grill. A light cook once a month may need only a quick brush. Grilling several times a week calls for a full steam clean after each session.
- Occasional grilling: Clean after every use, plus a deeper clean at the start and end of the season
- Weekly grilling: Steam clean after each session
- Heavy summer use: Quick brush before and after, with a full clean every few cookouts
Clean the grates within 15 to 30 minutes of cooking, while they are still warm, for the easiest results.
Troubleshooting Chips, Rust and Stubborn Residue
Not every flaw means a new set of grates. Use this triage to decide whether to clean, monitor, or replace.
Small chips and nicks
A chip smaller than a pea that exposes bare steel is usually cosmetic, but it needs attention. Clean the spot gently, dry it thoroughly, and apply a thin coat of cooking oil to the exposed metal after each cook to slow rust. Monitor it: if the chip grows, the coating around it is failing and replacement becomes the better call.
Cracks and crazing
Hairline cracks are a warning sign, not an emergency. Stop using harsh tools on the area, keep the grate dry between cooks, and watch for rust bleeding out of the crack. If cracks spread or the coating starts to lift at the edges, the grate is on its way out, replace it before flakes end up in food.
Rust
Surface rust on exposed steel can usually be scrubbed off with a bristle brush or scrubber, then dried and oiled. Rust that keeps coming back in the same spot, or that has eaten into the core, means the coating barrier is gone in that area. Deep or spreading rust is a replacement signal.
Flaking coating
This is the one to take seriously. Once the coating flakes, pieces can end up on food. Retire the grate, do not try to cook around it.
Stubborn baked-on residue
If normal steam cleaning will not lift it, extend the steam cycle: fill the brush, heat the grill, open the water valve, and hold the steam on the spot longer, working in short passes. A little warm water and dish soap helps on greasy buildup. Avoid the temptation to escalate to metal scrapers or wire brushes, on coated grates that turns a cleaning problem into a damage problem.
When to replace versus repair
| Condition | Action |
|---|---|
| Chip smaller than a pea, no spreading | Clean, dry, oil, monitor |
| Hairline cracks, no rust | Keep dry, monitor, plan replacement |
| Surface rust on exposed steel | Scrub off, dry, oil |
| Recurring rust in one spot | Plan replacement |
| Flaking coating | Replace now |
| Deep or spreading rust | Replace now |
Maintenance by frequency
- After every cook: quick steam pass and brush while warm
- Weekly: full steam clean with the water valve open, rinse, dry completely
- Start and end of season: deep clean, inspect for chips and cracks, oil exposed metal, and store grates dry
A quick inspection each time you clean catches small damage before it becomes a replacement. That habit, not any single tool, is what keeps ceramic grates in service the longest.
Frequently Asked Questions
How do you properly clean ceramic grill grates?
Preheat the grill for 15 to 30 minutes so food residue softens, then brush the grates while they are warm. Fill a steam cleaner such as the Grill Daddy Pro with water, close the lid, turn on the valve, and scrub while the steam loosens grease. Rinse with warm, soapy water if needed, then dry completely before the next cook. Avoid harsh metal scrapers on the coating.
Can you use a wire brush on ceramic grill grates?
Stiff wire brushes can scratch or chip the ceramic coating and leave loose bristles that may end up in food. A bristle-free scrubber or a steam brush with bristles locked in place is a safer choice for ceramic surfaces. Check your grill manufacturer's care guide before using any abrasive tool, since warranty terms may depend on the cleaning method.
How often should you clean ceramic grill grates?
Brush the grates after every cook while they are still warm, and do a deeper wash with warm, soapy water every few weeks if you grill often. Occasional grillers can clean after each use and do a thorough wash at the start and end of the season. Dry the grates fully after washing to prevent rust on any exposed metal.
How do you prevent rust on ceramic grill grates?
Rinse away soap and residue, then dry the grates completely before covering the grill. Leave the burners on briefly after cleaning to evaporate remaining moisture. Store the grill under a cover in a dry spot, and avoid leaving standing water in the firebox.
Keeping ceramic grill grates clean is simple once you have the right routine. Grill Daddy Brush Company makes steam-cleaning tools that work well on all grate types, and our lifetime warranty backs them up.


