

Quick Summary
Preheat the grill fully, clean the grates while they are hot, and oil them just before cooking so a barrier forms between the food and the metal. Pat food dry and let it release on its own before flipping. Together these steps keep most food from sticking to grill grates.
- Heat the grill for 10 to 15 minutes to loosen residue before scrubbing.
- Preheat gas grills on high with the lid closed for 10 to 15 minutes.
- Hold your palm 4 inches above the grate: a 2-to-3-second count means searing-hot.
- Oil the grates with a folded paper towel dipped in high smoke-point oil, applied just before cooking.
- Flip food only when it lifts away easily; forcing it tears the crust.
Table of Contents
- Why Food Sticks to Grill Grates
- How to Clean Grill Grates Before Every Cookout
- How to Preheat Grill Grates for a Nonstick Surface
- Oiling Grill Grates the Right Way
- Preparing Meat, Fish, and Other Foods to Prevent Sticking
- Troubleshooting Sticking by Cause
- Choosing a Cleaning Tool for Your Next Grill Session
- Frequently Asked Questions
Why Food Sticks to Grill Grates
Food sticks when proteins and sugars bond to hot metal. Leftover residue from the last cookout gives that bond a head start.
Sticking usually comes from three causes:
- Dirty grates: Old grease and charred bits act like glue.
- Cold grates: Metal that is not hot enough lets food settle and bond before it can release.
- No barrier: Bare metal with no oil or prepared surface gives proteins direct contact.
Fix all three and most sticking disappears.
How to Clean Grill Grates Before Every Cookout
Clean grates first. Scrape off residue while the grill is hot, then deal with what remains.
- Heat the grill for 10 to 15 minutes to loosen residue.
- Scrub the grates with a steam-based grill brush.
- Rinse or wipe away loosened debris with a clean cloth.
A steam brush works well here. Fill the Grill Daddy with water, heat the grill, turn on the water valve, and scrub. No bucket, no mess.
How to Preheat Grill Grates for a Nonstick Surface
Preheating is one of the most important anti-stick steps. A hot grate helps moisture leave the food's surface so it sears into a crust, while a cold or lukewarm grate gives proteins time to grip before any crust forms.
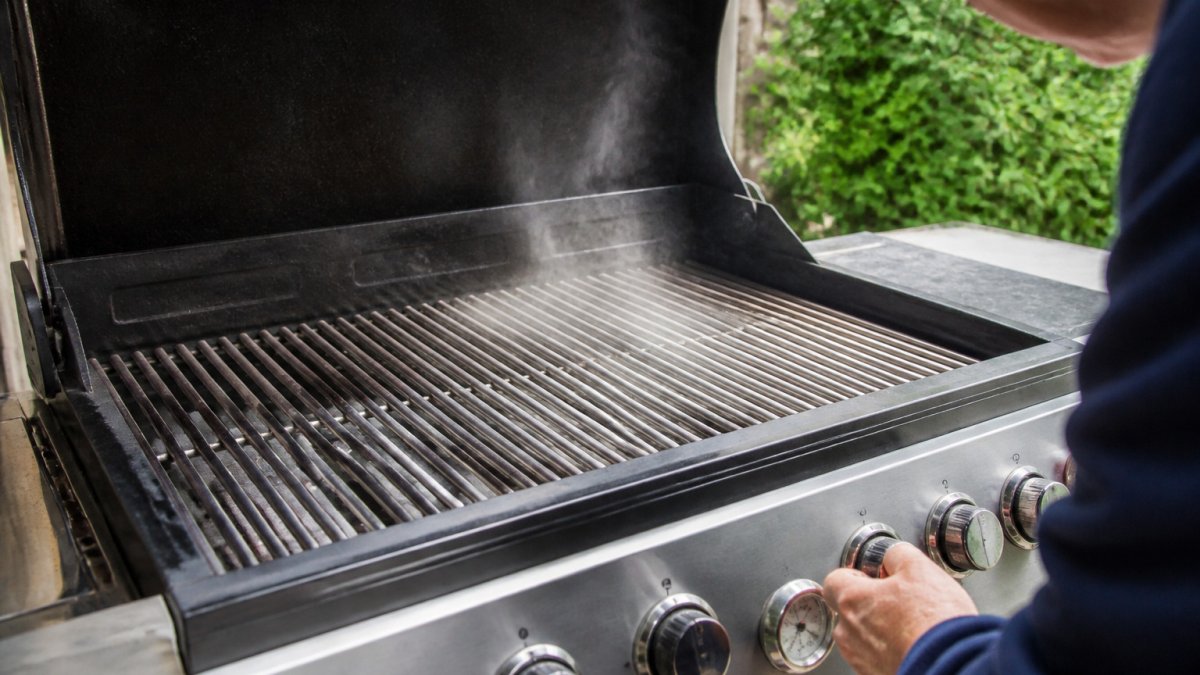
Target temperatures by grill type
- Gas grill: Preheat on high with the lid closed for 10 to 15 minutes. A lid thermometer or an infrared surface thermometer will confirm the grate itself is hot, not just the air.
- Charcoal grill: Light the chimney and let coals ash over, then spread them in a single layer and close the lid for 5 to 10 minutes. A grate-level reading of 400 to 500°F is a good working range for most foods.
- Pellet grill: Set to 400 to 450°F and allow 15 minutes with the lid down so the grates heat through, not just the chamber.
Aim for a clean, hot surface before adding food. If you do not own a surface thermometer, hold your palm about 4 inches above the grate: a 2-to-3-second count means it is searing-hot, 4 to 5 seconds is medium, and anything longer means keep preheating.
Read the release cues, not the clock
Timing is a rough guide; the surface tells you the truth. Watch for these signs that a crust has formed and the food is ready to release:
- The edges of the food lift slightly and you can see a browned band along the contact line.
- The food slides when you nudge it gently with tongs, no tugging required.
- Beads of moisture on the surface have cooked off and the exterior looks dry and matte rather than wet.
- For fish, the skin turns opaque and crisp at the edges before the fillet releases.
Food that resists lifting is usually not ready yet. Give it another 30 to 60 seconds and check again rather than forcing it, a torn crust is a stuck crust.
Match heat to the food
High heat is not universal. Delicate fish and vegetables with thin walls do better over medium (350 to 400°F) so the exterior does not char before the interior cooks. Thick steaks and burgers want the full searing range. If sticking happens only in one zone, your grill has hot spots, preheat longer and use the cooler zone for delicate items.
Oiling Grill Grates the Right Way
Oil creates a barrier between food and metal. Apply it to the grates, the food, or both.
- Oil the grates: Use a folded paper towel dipped in high smoke-point oil and held with tongs. Wipe the hot grates just before cooking.
- Oil the food: Brush a light coat onto meat, fish, or vegetables. This works well when you cannot oil the grates easily.
- Choose the right oil: Pick oils with high smoke points, such as canola or avocado oil.
Apply a thin layer. Excess oil drips, causes flare-ups, and burns on the grates.
Watch out: Never spray aerosol cooking oil onto a hot grill. The propellant can ignite and cause a flash fire.
Preparing Meat, Fish, and Other Foods to Prevent Sticking
Preparation makes a real difference before food reaches the grill, but the right prep depends on what you are cooking. Each food type has its own sticking risk and handling needs.
6-in-1 Grill Daddy BBQ Set – The Ultimate Grilling Toolkit →
The universal prep steps
- Pat food dry: Surface moisture steams instead of sears, which encourages sticking. Blot meat, fish, and vegetables with paper towels right before they hit the grates.
- Let meat rest at room temperature: Cold meat grips the grates more than meat that has rested for about 20 to 30 minutes. Do not leave raw meat out longer than that.
- Season and oil lightly: A thin coat of high smoke-point oil on the food creates a barrier. Salt draws moisture to the surface, so season just before grilling rather than hours ahead.
- Wait before flipping: Flip only when the food lifts away easily. Forcing it tears the crust.
Meat
Steaks, chops, and burgers benefit from a dry surface and a hot, oiled grate. Burgers are the exception to the "leave it alone" rule, press them once at the start to set contact, then leave them until they release. Chicken with skin wants medium heat so the skin renders and crisps without burning before the meat cooks through. Lower temperatures also prove essential when using spice-heavy seasonings, as preventing rub from burning requires careful heat management to ensure the exterior develops a deep crust rather than a bitter char.
Fish
Fish is the most delicate food on the grill because the flesh flakes apart before a crust can hold it together. Use these steps:
- Oil the grates and preheat them well before cooking fish.
- Place fish skin-side down and leave it alone until the skin crisps and releases on its own.
- Use a thin, flexible fish spatula to slide under the fillet rather than a stiff turner.
- Consider a fish basket or foil for very delicate fillets, or grill whole fish in a basket.
Vegetables
Vegetables stick for a different reason: high water content and low surface structure. Cut them into thick, flat planks (think 1/2-inch slices of zucchini or portobello caps) so there is enough surface to sear. Toss in oil before grilling, use a grill basket for small or loose pieces, and keep the heat at medium so sugars do not burn and bond.
Tofu
Tofu is mostly water, so press it first, 15 to 30 minutes under a weighted plate and paper towels, then cut into slabs and oil lightly. A firm or extra-firm block holds up best. Grill over medium heat and resist moving it until a browned crust forms.
Breading and coated foods
Breaded items are the highest sticking risk because the coating grabs bare metal. Use a light coat of oil on the grates, keep the heat moderate so the breading sets before it burns, and consider a foil-lined or basket setup for heavily breaded pieces. Flip once, gently, with a wide spatula.
Troubleshooting Sticking by Cause
Match the fix to the problem you see.
- Food tears when you flip it: The grates were not hot enough or not oiled. Preheat longer and oil the grates before cooking.
- Residue sticks to the new food: The grates were not clean. Scrape and brush the grates before the next use.
- Cast iron grates keep grabbing food: Old seasoning has worn thin. Clean the grates and re-oil them after each use. Learn the specific cleaning steps for cast iron grill grates.
- Sticking happens only on one side of the grill: Hot spots or uneven flame can cause this. Move food to cooler zones when needed.
Choosing a Cleaning Tool for Your Next Grill Session
Clean grates are the foundation of nonstick cooking, so the cleaning tool matters. Two options work well with Grill Daddy's steam system:
- Bristle brush: Stainless steel bristles that lift grease and grime with steam. Our Grill Daddy steam brush uses a bristle design.
- Bristle-free scrubber: An Aramid (Kevlar-like) fiber canvas pad for those who prefer no bristles on the grates. You can also see the bristle-free Aramid replacement scrubber for a steam-powered option.
Both options are safe and effective. Pick the one that fits your grill and your preferences.
For a full set of grill tools, the 6-in-1 Grill Daddy BBQ Set includes a spatula, tongs, fork, and spoon with heat shield protection, plus a carrying case.

Here is how the two cleaning tool options compare at a glance.
| Option | Best for | Key difference |
|---|---|---|
| Bristle brush | Grill owners who want a steam brush with stainless steel bristles | Lifts grease and grime with steam |
| Bristle-free scrubber | Anyone who prefers no bristles on the grates | Uses an Aramid fiber canvas pad |
Frequently Asked Questions
Why does food stick to grill grates?
Food sticks when proteins in meat, fish, or breading bond with the bare metal of the grate, especially when the grate is cold or dirty. Leftover residue from earlier cookouts creates an uneven surface that food grabs onto. Preheating the grill to a high temperature and cleaning the grates before each use reduces that bonding. A light coat of high smoke point oil applied to the grates just before cooking adds a barrier that helps food release cleanly when it has browned.
Should grill grates be hot before cooking?
Yes. Grates should be preheated for about 10 to 15 minutes with the lid closed so the metal is hot enough to sear the surface of the food right away. Food placed on a cold grate tends to stick as it cooks and the proteins bond to the metal. Once the food releases on its own after a few minutes of searing, it is ready to turn. Forcing it off early usually tears the crust and leaves residue behind.
Should I spray grill grates with oil?
Spraying or brushing a thin coat of oil onto preheated grates helps create a barrier between food and metal. Choose an oil with a high smoke point, such as canola or avocado oil, and apply it with tongs and a folded paper towel. Avoid heavy coats, which cause flare-ups and smoke. Oiling the food itself, rather than only the grates, also works well for many proteins and vegetables. Keep a fire extinguisher or a spray bottle of water nearby when working with oil over open flame.
How do I keep fish from sticking to the grill?
Clean and preheat the grates, then oil them thoroughly just before placing the fish on the grill. Pat the fish dry and brush it lightly with oil. Place skin side down and leave it undisturbed until the skin releases easily, usually within three to five minutes depending on thickness. Using a thin, flexible fish spatula helps lift the fish cleanly. Fish that sticks even after these steps often went onto a grate that was not hot enough or had not been oiled.
Ready to make sticking a thing of the past? Grill Daddy steam brushes clean grates without harsh chemicals, and the lifetime warranty backs every purchase. Add to cart and start your next cookout with grates that are clean and ready to cook.


