

Table of Contents
- Why Safe Grill Cleaning Matters for Your Family
- How to Clean Grill Grates Without Loose Bristles or Chemicals
- Choosing Safe Grill Cleaning Tools for Your Setup
- How to Clean a Grill After Sitting Unused
- How Often to Clean Grill Grates: A Realistic Schedule
- Child Safety During Grill Cleaning
- Common Mistakes to Avoid
- Frequently Asked Questions
Last Updated: October 7, 2026
Why Safe Grill Cleaning Matters for Your Family
Safe grill cleaning for busy parents isn't just about keeping your grates spotless. It's about protecting your family from hazards you might not even realize exist. Loose bristles from traditional wire brushes can end up in food. Harsh chemical cleaners leave residue that builds up over time. And a poorly maintained grill becomes a fire risk.
Parents want a clean grill. They don't want to worry about what's actually on those grates when they cook dinner.
The stakes are real. A grill that hasn't been properly cleaned can harbor bacteria in grease buildup. Food residue mixed with cleaning chemicals creates a health concern. And if your kids help with grilling or hang around the backyard during cleaning, safety becomes even more critical.
The good news: safe grill cleaning doesn't have to be complicated or time-consuming. It starts with understanding what you're actually trying to remove and choosing the right tools for the job.
How to Clean Grill Grates Without Loose Bristles or Chemicals
Removing grease and food residue from grill grates comes down to one thing: breaking down the buildup so it releases easily. Traditional methods use elbow grease and harsh chemicals. There's a better way.
The Steam-Cleaning Advantage
Steam cleaning uses heat and moisture to melt grease on contact. No harsh chemicals. No loose bristles falling into your food. The process is simple: water transforms into penetrating steam that breaks down even stubborn, burnt-on residue.
This matters because grease buildup isn't just messy. It traps bacteria and creates flare-up risks during cooking. When you remove it completely, your grill becomes safer and performs better.
The steam approach works on all grate types. Stainless steel, ceramic, cast iron, it doesn't matter. The heat and moisture do the work, not abrasive scrubbing that can damage finishes or leave scratches.
Step-by-Step Cleaning Process
Here's how to clean your grill safely and efficiently:
1. Preheat your grill (Time: 3 minutes) Turn on your grill and let it heat for a few minutes. Heat loosens grease and makes it easier to remove. You don't need extremely high heat, medium temperature is plenty.
2. Fill your steam brush with water (Time: 1 minute) Remove the fill cap and add water. Most steam brushes hold enough for a complete cleaning session.

3. Turn on the steam valve (Time: 1 minute) Once the grill is hot, activate the water valve.
4. Scrub the grates thoroughly (Time: 8-10 minutes) Work the brush across all surfaces. The steam does most of the work, but you still need to move the brush across every inch.
5. Check for stubborn spots (Time: 2-3 minutes) Some areas might need extra attention. Use a scraper tool for burnt-on spots that resist the initial pass. The combination of steam and scraping removes everything.
6. Empty and dry (Time: 1 minute) After cleaning, empty any remaining water and leave the valve open to dry completely.
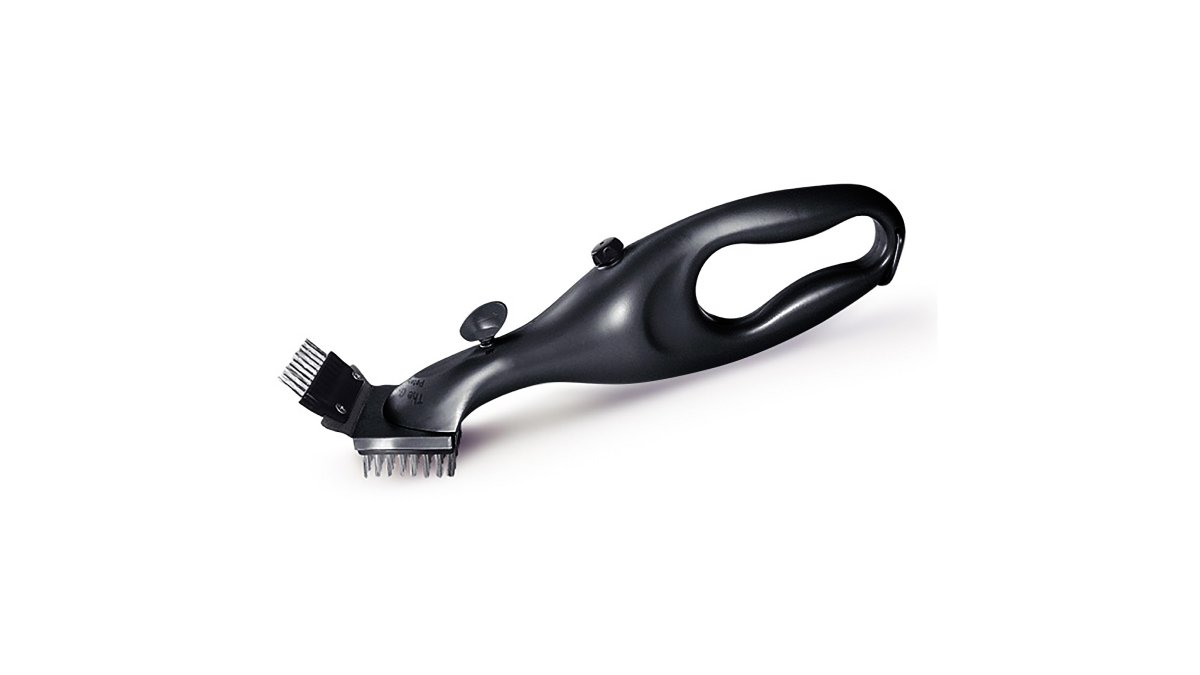
Total time: 15-20 minutes for a complete, safe cleaning job.
Choosing Safe Grill Cleaning Tools for Your Setup
Not all grill brushes are created equal. Your choice matters for safety, effectiveness, and durability.
Bristle vs. Bristle-Free Options
Bristle brushes use stainless steel bristles locked securely in place. The advantage: aggressive cleaning power for tough buildup. Stainless steel bristles don't rust and last for years. The trade-off: you need to verify bristles stay locked in place, especially if you grill frequently.
Bristle-free scrubbers use Aramid fiber (similar to Kevlar) in a coarse canvas pad. No loose bristles means zero risk of bristles in your food. These work exceptionally well on all grate types and are dishwasher-safe for easy cleaning. The trade-off: they're slightly less aggressive on extremely stubborn buildup, though steam does most of the work anyway.

For busy parents, the choice comes down to your comfort level. Both are safe and effective. Bristle-free options offer peace of mind if you have young kids or worry about bristle shedding. Bristle brushes offer maximum cleaning power if you're willing to inspect them regularly.
The NSF certification standards for potable water contact ensure that steam brushes designed for food-contact surfaces meet strict safety requirements. Look for this certification when choosing your tool.
What to Avoid
Skip traditional wire brushes with loose bristles. These shed constantly. Even "no-shed" wire brushes eventually lose bristles, it's just a matter of when. Why take the risk?
Avoid chemical degreasers and heavy-duty cleaners. They leave residue that builds up over time and can contaminate your food. You're trying to make your grill safer, not introduce new chemicals.
Don't use abrasive scrubbing pads designed for dishes. They can scratch grate finishes and don't work well on high-heat surfaces. Your grill needs a tool designed specifically for the job.
How to Clean a Grill After Sitting Unused
Grills that sit for weeks or months accumulate more than just dust. Moisture collects. Grease oxidizes. Insects sometimes nest in the burner areas.
Start by removing the grates if possible. Check for any visible nesting or debris. Use a soft brush to clear out the interior. Then reassemble and preheat.
Follow the standard cleaning process, but spend extra time on the interior surfaces where moisture collects. The steam penetrates deep and removes oxidized grease that regular brushing might miss.
After cleaning, run your grill on high heat for 5-10 minutes with the lid open. This burns off any residual moisture and ensures everything is completely dry before you store it again.
If your grill has been unused for several months, inspect the burner ports carefully. Food residue or debris can block them. A thin wire or pipe cleaner helps clear small openings without damaging the burner itself.
NEW Grill Daddy Pro with Bristleless Grill Scrubber →
How Often to Clean Grill Grates: A Realistic Schedule
Busy parents need a maintenance schedule that actually fits their lives. Here's what works:
Before every cook: Quick 5-minute wipe-down with a damp cloth or light brush pass. This removes dust and loose debris. Takes almost no time and keeps buildup from starting.
Weekly (if you grill 2+ times per week): Full steam cleaning using the 15-20 minute process. This removes grease and food residue before it hardens.
Monthly (if you grill 1-2 times per week): Full cleaning with extra attention to grease tray and drip pans. Empty and rinse these components thoroughly.
Seasonally: Deep inspection of all components. Check for damage, missing parts, or corrosion. Clean the interior thoroughly. This prevents small problems from becoming big ones.
After heavy use: If you've hosted a big BBQ or cooked multiple meals in one day, clean immediately. Grease accumulates faster under high-use conditions.
| Frequency | Task | Time Required |
|---|---|---|
| Before cooking | Quick wipe-down | 5 minutes |
| Weekly (frequent grilling) | Full steam cleaning | 15-20 minutes |
| Monthly | Deep clean + drip pan | 25-30 minutes |
| Seasonal | Inspection + full maintenance | 45-60 minutes |
The key: consistent light cleaning beats occasional heavy cleaning. Your grill stays safer, performs better, and lasts longer.
Child Safety During Grill Cleaning
Kids and grills don't mix, but they can coexist safely with clear boundaries and age-appropriate precautions.
Age-Appropriate Precautions
Ages 3-5: Keep them completely away from the grill during cleaning. Hot surfaces, steam, and water create multiple hazards. Let them play in another area of the yard. No exceptions.
Ages 6-8: They can watch from a safe distance (at least 6-8 feet away) if supervised. Explain what you're doing in simple terms. Never let them touch the grill or tools. Make it clear that the grill is hot and dangerous.
Ages 9-12: They can help with preparation tasks like filling the water reservoir (when the grill is off and cool). They can fetch tools or organize supplies. Still no touching the hot grill. Explain why: "The steam is hot enough to burn skin. We watch and learn first."
Ages 13+: With direct supervision, older teens can learn the cleaning process. This teaches responsibility and safety awareness. Make sure they understand every hazard before they touch anything.
Preventing Food Allergen Cross-Contact
This matters more than most parents realize. Grease buildup traps old food particles. If someone with a severe peanut or shellfish allergy uses your grill, residue from previous meals can contaminate new food.
Clean your grill thoroughly before cooking for guests with allergies. Don't just wipe it down, do a full steam cleaning. This removes all grease and residue where allergens hide.
If different family members have different allergies, consider designating specific grates or sections for each person. Clean between uses. Label your tools so everyone knows which brush goes where.
Talk to your guests before grilling. Ask about allergies. Tell them how you're cleaning the grill. Most people with severe allergies appreciate the honesty and care.
After cooking for someone with an allergy, clean immediately. Don't let grease and food particles sit and harden. Fresh cleaning is easier and safer.
Common Mistakes to Avoid
Mistake 1: Cleaning a cold grill. Cold grates don't release grease easily. You'll work twice as hard and get half the results. Always preheat first.
Mistake 3: Ignoring the grease tray. People focus on the grates but forget the drip pan underneath. Grease collects there and creates fire hazards.
Mistake 4: Skipping the interior. The inside of your grill matters as much as the grates. Grease buildup on interior walls creates flare-ups.
Mistake 5: Rushing the process. A 15-minute cleaning beats a 5-minute one every time. You catch problems early. You prevent grease from hardening.
Mistake 6: Forgetting to dry completely. Water left on grates causes rust over time.
Mistake 7: Using harsh chemicals. They don't work better than steam. They leave residue. They create fumes. They're unnecessary when you have a better option.
Safe grill cleaning for busy parents comes down to choosing the right tools and sticking to a realistic schedule.
The Grill Daddy Pro and Bristleless Grill Daddy Pro both deliver the cleaning power your family needs.
Frequently Asked Questions
What is the safest way to clean grill grates?
Steam-powered cleaning is one of the safest methods because it eliminates loose bristles, requires no harsh chemicals, and sanitizes grates without residue. Fill a steam brush with water, preheat your grill, and activate the steam valve while scrubbing. This approach works on all grate types, stainless steel, cast iron, and ceramic, and takes just 15-20 minutes. For families with food allergies, steam cleaning removes allergen residue more thoroughly than dry brushing alone.
How often should you clean grill grates?
Clean grill grates before each cooking session to remove dust, debris, and allergen buildup. After cooking, a quick 5-minute scrub removes food residue and prevents grease from hardening. Deep cleaning with steam should happen monthly during grilling season, or every 2-3 months if you grill infrequently. If your grill sits unused for more than a month, clean it thoroughly before using it again to remove oxidation and debris.
Can you use steam to clean a grill after it has been sitting unused?
Yes. Grills that sit for weeks or months accumulate rust, dust, and oxidation. Preheat the grill to medium-high heat for 10 minutes to loosen buildup, then use a steam brush to scrub away grease and grime. For stubborn rust on cast iron, you may need two passes. Steam penetrates where dry brushing cannot reach, making it ideal for restoring a grill that has been sitting. Empty the water reservoir after cleaning and leave the valve open to dry.
How do you prevent loose bristles from falling into food?
Use a grill brush with secure bristle-lock technology that locks bristles in place, testing shows properly engineered brushes resist bristle loss even under high pull force. Inspect your brush before each use: run your finger across the bristles to check for damage or shedding. If bristles feel loose or the brush head is cracked, replace it immediately. Bristle-free scrubbers made from Kevlar-like material eliminate this concern entirely and are equally effective at removing grease and food residue.


