

Last Updated: November 9, 2026
Quick Summary
To remove grease from a grill firebox, start with a cold grill, lift out the grates, heat tents, and grease tray, then scrape the firebox floor with a putty knife and wipe loose residue. Finish by degreasing the interior with steam or a mild cleaner, keeping burner tubes and igniters in place and dry.
- Scrape the firebox floor toward the grease tray opening using short, flat strokes.
- Leave burner tubes and igniter electrodes in place unless your manual says otherwise.
- Cover exposed electrical connections before applying any liquid to the firebox.
- Empty the grease tray before it is more than half full to avoid flare-ups.
- Do not cook on a firebox that is warped, cracked, or has burned-through metal.
Table of Contents
- Why Grease Builds Up in the Firebox and What It Costs You
- What You'll Need Before You Start
- Step 1: Disassemble and Scrape Out the Firebox
- Step 2: Clean the Firebox Interior Without Harsh Chemicals
- How to Deep Clean a Gas Grill the Right Way
- Best Tools for Grill Firebox Cleaning
- How to Prevent Grill Grease Fires and Recurring Buildup
- Pick Your Grill Daddy and Get the Firebox Clean
- Frequently Asked Questions
Why Grease Builds Up in the Firebox and What It Costs You
Every cookout leaves something behind. Fat drips off the food, hits hot metal, and bakes into the bottom of the firebox. Over time that layer turns hard, dark, and sticky.
Learning how to remove grease from grill firebox surfaces starts with understanding where it comes from.
Here is the real cost of skipping it:
- Flare-ups. Grease catches fire and scorches your food.
- Off flavors. Old fat smokes into every burger you cook.
- Rust. Trapped moisture and grease eat at the metal.
- Shorter grill life. A clogged firebox runs hotter and wears faster.
A grease fire is the worst outcome. It can warp parts and damage your grill beyond repair. Routine cleaning helps prevent most of it.
What You'll Need Before You Start
Gather your supplies first so you are not hunting for a scraper mid-job. Most of what you need is already in your kitchen.
Safety Gear and Basic Supplies
- Heat-resistant gloves to protect your hands
- Safety glasses for scraping debris
- A putty knife or grill scraper for caked-on grease
- A grill brush for loosening residue
- Warm water and dish soap for washing parts
- Paper towels or rags for wiping
- Baking soda for stubborn spots
- White vinegar as a mild degreaser
Harsh chemicals can leave residue that touches your food later, so simple tools and steam are a good alternative.
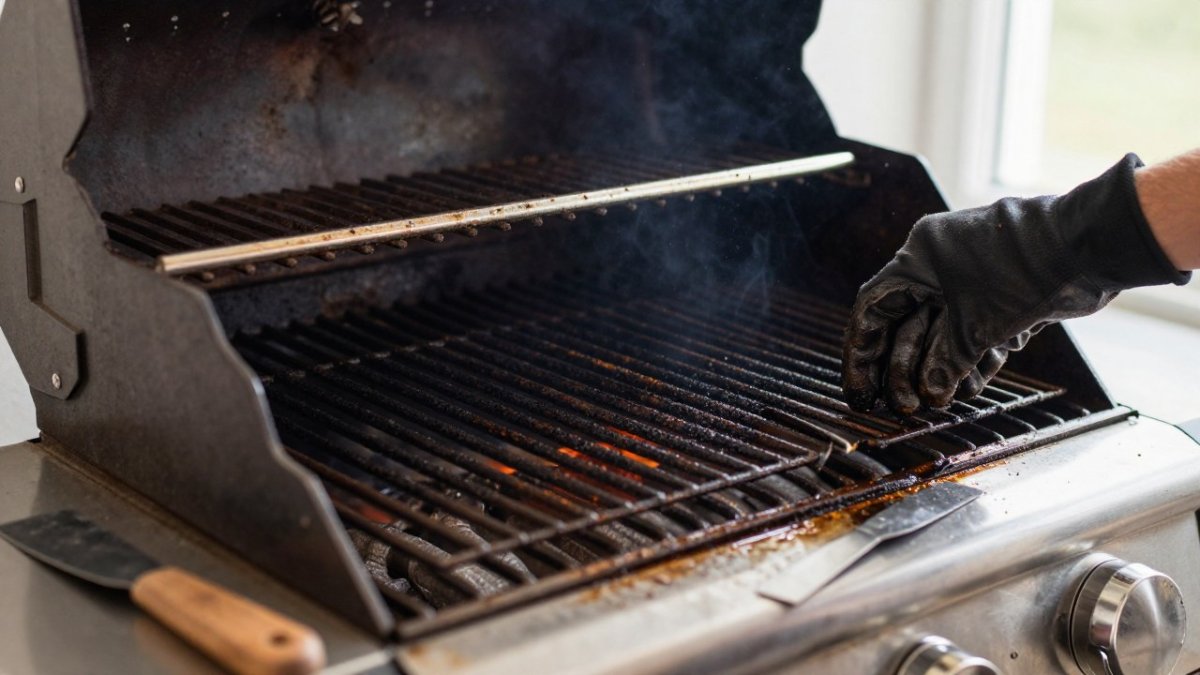
Step 1: Disassemble and Scrape Out the Firebox
Start with a cold grill. Never work inside a hot firebox. Remove the parts in this order so nothing gets damaged.
Removing Grates, Heat Tents, and Burner Tubes
- Lift out the grill grates and set them aside.
- Pull the heat tents or burner hoods off the burner tubes.
- Take out the burner tubes only if your manual says they are removable. Otherwise, leave them in place.
- Slide out the grease tray and drip pan.
- Scrape the firebox floor with your putty knife. Push food debris and ash toward the grease tray opening.
- Wipe loose residue with a paper towel.
Watch out: never bend or pry the burner tubes. A bent tube blocks gas flow and causes uneven heating or a dangerous flare-up. Scrape gently around them.
Protecting Burners, Igniters, and Electrical Parts
The firebox is not just a metal box, it houses the burner tubes, the igniter electrodes, and often a wire harness or battery-powered ignition module. Before you scrape or spray anything, identify what stays and what goes.
- Leave the burner tubes in place unless your manual explicitly says they are removable. Most gas grills are designed so the tubes stay mounted; pulling them can misalign the gas orifice or damage the venturi.
- Do not remove the igniter electrodes. They are ceramic-tipped and brittle. A putty knife that slips can crack the ceramic and kill your ignition.
- Cover exposed electrical connections with a dry rag or plastic wrap before you apply any liquid. Water in a wire connector causes intermittent ignition or a no-start condition.
- Keep scrapers flat and parallel to the firebox floor. Angling the blade digs into seams and can pry up the burner mounting brackets.
A common pattern is to scrape from the center toward the grease tray opening, working in short strokes rather than long drags. Long drags catch on burner brackets and heat-tent studs, and that is where bent tubes and cracked igniters happen.
What to Remove vs. What to Leave in Place
| Component | Remove? | Why |
|---|---|---|
| Grates | Yes | Easy to lift out and wash separately |
| Heat tents / burner hoods | Yes | Expose burner tubes for scraping |
| Burner tubes | Only if manual says so | Misalignment risks gas flow and ignition |
| Igniter electrodes | No | Ceramic tips crack easily |
| Grease tray / drip pan | Yes | Slide out for separate cleaning |
| Wire harness / ignition module | No | Keep dry; cover before applying liquid |
Once the firebox floor is scraped and the loose residue is wiped, you are ready to degrease the interior.
Step 2: Clean the Firebox Interior Without Harsh Chemicals
Steam and simple tools are a practical way to clean the interior. Steam softens caked-on grease on contact.
How to Remove Hardened Grease with Steam and Simple Tools
Fill a steam grill brush with water, heat the grill, turn on the water valve, and scrub. No bucket, no mess. Then wipe with a paper towel.
For the full process, our step-by-step steam cleaning guide walks through every pass. If the grease has really baked on, this guide to removing baked-on grill grease goes deeper.
No steam brush handy? Try these:
- Baking soda paste. Mix baking soda and water, spread it on, wait, then scrub.
- White vinegar spray. Loosen light grease before wiping.
- Dish soap and warm water. Wash removable parts in a bucket or sink.
Rinse every part with clean water and dry it fully. Trapped moisture leads to rust. Reassemble once everything is dry.
How to Deep Clean a Gas Grill the Right Way
A firebox clean is one piece of a bigger job. A full deep clean covers the grates, burners, interior walls, and exterior.
Here is the order that works:
- Burn off loose residue with a high-heat burn-off.
- Disassemble grates, heat tents, and trays.
- Degrease the firebox with steam or a mild cleaner.
- Clean the burner ports with a soft brush. Never enlarge them with a pin.
- Wash and dry removable parts.
- Wipe the exterior and check the grease tray.
- Reassemble and run a short burn-off.
For the complete walkthrough, see our 7-step gas grill deep clean.
Best Tools for Grill Firebox Cleaning
The right tools cut your cleaning time in half. We keep our kit small and simple.
- A steam grill brush. Melts grease without chemicals.
- A stiff putty knife. Handles caked-on grease on flat surfaces.
- A wire or bristle-free brush. Reaches corners and grates.
- A grease tray scraper. Clears the drip pan fast.
- Heat-resistant gloves. Keeps your hands safe on hot metal.
A pressure washer seems tempting, but high-pressure water can force grease into burner ports and electrical parts. A damp rag and a brush are a safer choice.
How to Prevent Grill Grease Fires and Recurring Buildup
Prevention beats scrubbing every time. A few habits keep grease from piling up, and a few troubleshooting checks keep it from coming back.
- Scrape the grates after every cook while they are still warm.
- Empty the grease tray before it fills. A tray that is more than half full is a flare-up waiting to happen.
- Do a high-heat burn-off after cooking to burn off light residue.
- Deep clean the firebox every few months, more often in heavy grilling season.
- Check for grease buildup before you light the grill.
- Store your grill covered to keep moisture out.
Troubleshooting Recurring Buildup and Flare-Ups
If you clean the firebox and still get flare-ups or fast grease accumulation, the cause is usually one of these:
- Blocked grease drain. Grease pools in the firebox instead of draining to the tray. Clear the drain hole with a stiff wire or a putty knife tip.
- Overfilled or misaligned grease tray. A tray that is full or not seated under the drain lets grease back up into the cook box.
- Uneven grill placement. A grill that sits off-level lets grease pool on one side instead of draining. Check the level with a spirit level and adjust the casters or feet.
- Too-infrequent deep cleans. Light scraping does not remove the baked-on layer that holds moisture and feeds flare-ups. A quarterly deep clean is the baseline for most households.
- Cooking high-fat foods without a drip plan. Fatty cuts and marinades load the firebox fast. Use a drip pan under the food and empty the tray after each cook.
Grease-Fire Cleanup vs. Routine Grease Removal
These are two different jobs. Routine removal means wiping and scraping a little grease each time you cook. Grease-fire cleanup means dealing with the aftermath of a real fire, and it is not the same as a deep clean.
After a grease fire, let the grill cool completely. Then:
- Remove all removable parts, grates, heat tents, trays, and set them aside.
- Scrape out burned residue from the firebox floor and walls. Burned grease turns into a crust that traps moisture.
- Inspect the burner tubes for warping, cracking, or clogged ports. A warped tube changes the flame pattern and should be replaced.
- Inspect the igniter electrodes and wire harness for melted insulation or cracked ceramic. Replace damaged ignition parts before lighting the grill again.
- Check the firebox walls and bottom for warping or cracked welds. A firebox that has warped or cracked should not be used, it can leak gas or fail structurally.
- Replace the grease tray if it is warped or has a hole.
Watch out: if the firebox itself is warped, cracked, or has burned-through metal, do not cook on the grill. A damaged firebox can leak gas and is a safety hazard, not a cleaning problem.
Pick Your Grill Daddy and Get the Firebox Clean
A clean firebox means better food and a safer cookout. The challenge is getting hardened grease out without harsh chemicals or a bucket of water.
That is exactly what our steam brushes solve. Fill the brush with water, heat the grill, turn on the water valve, and scrub. There is no bucket and no mess.
Here is how to choose:
| Product | Price | Best For |
|---|---|---|
| Original Grill Daddy Steam Brush | $29.99 | Smaller grills, tailgating, oven racks |
| Grand Grill Daddy Platinum | $59.99 | Medium to large grills and tougher jobs |
Both options are safe for stainless steel, ceramic, and cast iron grates.

Ready to make firebox cleaning easy?
Frequently Asked Questions
What dissolves grill grease?
Heat and water do most of the work. Steam melts caked-on grease so it lifts off the surface instead of smearing. For the firebox itself, scrape off loose food debris first, then scrub with a steam brush or a warm water and dish soap solution. Baking soda paste handles small stubborn spots. Save heavy chemical degreasers for exterior surfaces, and never spray oven cleaner inside a firebox where residue can reach burner ports.
Can a dirty firebox cause a grease fire?
Yes. Grease and food debris collect at the bottom of the firebox and in the drip pan, and a high-heat burn-off can ignite that buildup. A firebox cleaned on a regular schedule removes the fuel before it can catch. If a grease fire does start, turn off the burners, keep the lid closed, and let it burn out. Never spray water on a grease fire.
How often should you deep clean a grill firebox?
For a grill used several times a week, plan a deep clean every 2 to 3 months. Light users can stretch it to once or twice a season. Scrape the firebox bottom and empty the grease tray more often, roughly every few cooks, so buildup never gets thick enough to harden. Check the firebox before your first cook of the season regardless of use.
Is it safe to use degreasers inside a grill firebox?
Be cautious. Chemical degreasers and oven cleaners leave residue that can reach burner ports and the cooking surface. If you use one, apply it only to removable parts, rinse thoroughly, and let everything dry before reassembly. For the firebox interior, steam from a Grill Daddy brush or warm water with dish soap cleans grease without leaving a chemical film behind.


