

Table of Contents
- Why Safe Steam Cleaning for Outdoor Grills Matters
- What You'll Need Before You Start
- How to Clean Grill Grates with Steam: The Complete Process
- How to Remove Grease from Grill Grates Safely
- Choosing the Best Grill Cleaning Tool for Your Needs
- Safety Checks Before and After Steam Cleaning
- Common Mistakes to Avoid
- Frequently Asked Questions
Last Updated: October 12, 2026
Why Safe Steam Cleaning for Outdoor Grills Matters
Safe steam cleaning for outdoor grills transforms grill maintenance. Steam's heat and moisture break down stubborn grease, carbon buildup, and food residue without harsh chemicals or loose bristles.
At Grill Daddy Brush Company, we've spent nearly two decades perfecting steam-powered grill maintenance. Traditional brushes scrape the surface; steam penetrates deeper, sanitizing grates where bristles cannot reach.

Most grill owners don't realize how much debris accumulates between sessions.
What You'll Need Before You Start
Gather these items before you begin:
- A steam cleaning grill brush with a water reservoir
- Clean water (tap water works fine)
- Heat source (your grill's burners or charcoal)
- Grill thermometer (optional)
- Towel or cloth for drying
- Work gloves (the grill and steam will be hot)
Steam cleaning needs no special solutions, buckets, or additives. Water and heat do all the work. For stubborn buildup, keep a grill scraper nearby, but the steam brush handles most jobs on its own.
How to Clean Grill Grates with Steam: The Complete Process
The process is straightforward. Most grills can be cleaned in under 15 minutes.
Step 1: Preheat Your Grill
Turn on your grill and let it run for 10-15 minutes. The grates need to be hot, around 400°F if you have a thermometer. Hot metal absorbs steam more effectively and loosens grease faster. For charcoal, spread the coals and let them reach a steady heat; for gas, turn all burners to medium-high.
Step 2: Fill and Pressurize Your Steam Cleaning Grill Brush
With your grill preheated, fill your steam brush with clean water. Turn the valve off and place the brush on the hot grill; the heat creates steam pressure. Start with moderate pressure and increase if needed.
Step 3: Begin Cleaning the Grates
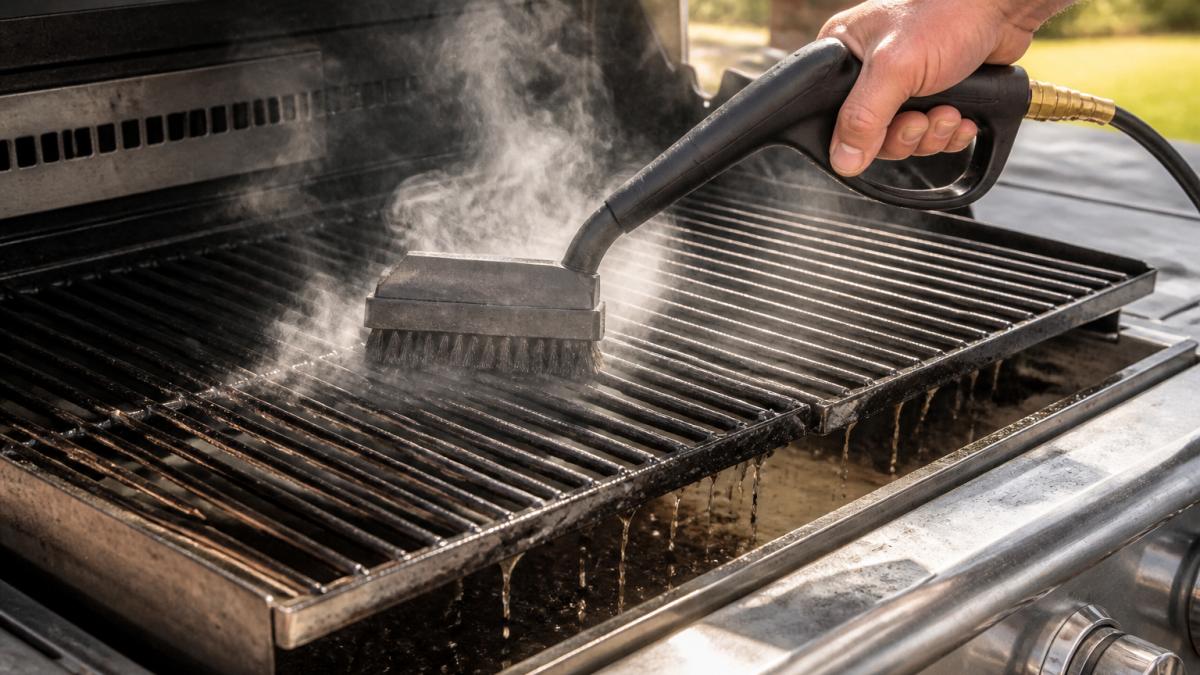
Open the steam valve and scrub in a crosswise motion across the grates. The steam melts grease on contact, and you'll see buildup soften and run off. Move systematically from one end to the other, covering each grate completely. Light pressure is enough; let the steam break down the grease, then wipe it away.
Step 4: Handle Stubborn Residue
Some areas have thick carbon or grease that doesn't lift on the first pass. Return to those spots and repeat the steaming process; if buildup persists, gently dislodge it with a grill scraper while the steam is still active. Never scrape cold grates. Most stubborn spots clear within two passes.
How to Remove Grease from Grill Grates Safely
Grease removal is where steam separates itself from every other method. Understanding what happens on the grate helps you clean faster and verify the surface is ready for food.
Why Steam Lifts Grease When Brushing Alone Does Not
Baked-on residue is a mix of polymerized fat, carbonized food, and smoke deposits that bonds to the metal and hardens as it cools. A dry brush abrades the top layer and pushes the rest around; a chemical cleaner dissolves some but leaves a film to rinse off.
Steam attacks the bond from two directions: heat re-liquefies the fat, and moisture gets under the residue and lifts it off the metal. Once liquid, gravity sends the grease down the grates and into the cook box.
The Steam-and-Wipe Cycle
- Heat the grates so they are hot enough to flash water into steam on contact.
- Open the water valve and move the brush in a steady crosswise pattern, covering each grate end to end.
- Watch for the change. The residue goes from matte and crusted to glossy and loose as the grease re-liquefies.
- Wipe while warm. Run a dry cloth along the grates to pick up loosened grease before it cools and re-hardens.
- Repeat on heavy areas. Thick carbon may need a second pass. Most grates clear in one or two cycles.
Steam vs. Chemical Cleaners vs. Dry Brushing
| Method | How it removes grease | Residue left behind | Best for |
|---|---|---|---|
| Steam | Heat re-liquefies fat; moisture lifts it off the metal | None, water only | Routine and deep cleaning, food-contact surfaces |
| Chemical cleaner | Solvents dissolve the residue | Possible film; needs thorough rinsing | Heavily neglected grills, off-grate parts |
| Dry brushing | Abrasion scrapes the top layer | Loose debris and dust | Quick touch-ups between cooks |
Steam wins on food-contact safety because nothing but water touches the grate. Chemicals add a rinse step and a residue question; dry brushing is fine for a fast pass but does not reach the bonded layer.
Verifying the Grate Is Ready for Food
A grate can look clean and still carry a film of grease or loosened carbon. Before you cook, run this check:
- Wipe test: Drag a clean white cloth along a grate. If it comes away gray or greasy, do another steam-and-wipe pass.
- Sight test: Look for dull patches or uneven color.
- Feel test: Once cool enough to touch, the grate should feel smooth, not tacky.
- Heat test: Bring the grill back to cooking temperature for a few minutes so any remaining residue smokes off.
Handling Stubborn Carbon and Rust Spots
Thick carbon that survives two steam passes can be loosened with a gentle scraper while the grate is still hot, then steamed again. Never chip at cold, hardened carbon, it is more likely to damage the surface than to come off.
Surface rust on cast iron or carbon steel is a different problem. Steam removes the grease that hides it, making rust easier to spot. Treat rust by scrubbing it clean, drying the grate thoroughly, and re-seasoning with a thin coat of oil.
Choosing the Best Grill Cleaning Tool for Your Needs
The right tool depends on your grill size, how often you cook, and your preference for bristle versus bristle-free cleaning. Both approaches work.
Bristle vs. Bristle-Free Options
Stainless steel bristle brushes are durable and effective, with securely locked bristles that stay in place during cleaning and provide excellent scrubbing action on tough, carbonized buildup.
Bristle-free scrubbers use Aramid or Kevlar-like coarse fiber pads instead of bristles. The abrasive surface scrubs effectively, works on all grate types, and is dishwasher-safe.
Both options are safe and effective, so the choice is personal preference. If you've used wire brushes for years without issues, bristle brushes work fine.
| Feature | Bristle Brush | Bristle-Free Scrubber |
|---|---|---|
| Scrubbing power | Excellent | Excellent |
| Bristle shedding risk | Minimal (locked bristles) | None |
| Grate compatibility | All types | All types |
| Durability | Long-lasting | Long-lasting |
| Maintenance | Replace head periodically | Dishwasher-safe |
For most outdoor grill owners, the Original Grill Daddy Steam Brush handles routine cleaning efficiently. If you have a larger grill or tackle heavier buildup regularly, the Grill Daddy Pro offers more steam capacity and a longer handle for easier reach.
The Original Grill Daddy® Steam Brush →

Safety Checks Before and After Steam Cleaning
Steam and hot metal are a safe combination when you control the sequence. The checks below cover protecting components steam can damage, managing the steam itself, and verifying the grill is dry before you cook again.
Before You Steam: Shut Down, Cool, and Protect
Shut off the fuel and confirm it is off. For gas, close the tank valve first, then turn the burner knobs off.
Cool to a working range, not cold. Steam cleaning works on a hot grill, but you do not need peak heat. Preheat, then let the grill settle to a moderate range before scrubbing.
Protect parts steam should not reach. Steam is moisture plus heat, and that combination is hard on some components:
- Ignition systems and electrodes: Keep the steam brush away from the igniter and its wiring. Moisture in the electrode or connector can cause a weak or failed spark.
- Thermometers and probes: Do not direct steam at the dial, the probe, or the sensor wire. Heat and moisture can throw off readings.
- Electronic control panels and displays: Wipe these with a barely damp cloth, never a steam jet. On pellet grills, keep steam off the controller, the fan, and the auger motor housing.
- Burners and gas tubes: Steam the grates and the cook box, but do not blast the burner ports. Debris forced into the ports can clog them.
- Seals, gaskets, and lid dampers: Steam can dry out or warp these over time. Clean them with a cloth instead.
Stage the area. Set the grill on level ground, keep the lid open so steam and heat escape, and keep anything flammable out of reach.
After You Steam: Dry, Inspect, and Relight
Empty and dry the brush. Drain remaining water, leave the valve open, and let the brush air-dry. Standing water promotes mineral buildup and rust.
Clear the cook box. Wipe out loosened grease so it does not bake onto the burners or the bottom of the grill next time.
Dry the components before relighting. Give the burners, igniter area, and electronic parts time to dry.
Verify function before you cook.
- Confirm the tank valve and all knobs are in the correct position.
- Relight and check that every burner lights evenly and holds a steady flame.
- Look over the grates for loosened debris or residue.
A two-minute check on each end keeps a steam clean from turning into a repair.
Common Mistakes to Avoid
Most people make the same errors when learning steam cleaning.
Cleaning a cold grill. Steam works best on hot metal.
Overfilling the water reservoir. Too much water means excess pressure and potential leaks.
Scraping too aggressively. Gentle scraping after steaming is fine; violent scraping damages grates.
Using the wrong water. Tap water works perfectly; distilled is unnecessary.
Not brushing in a consistent pattern. Random scrubbing leaves spots.
Steam cleaning your outdoor grill is faster, safer, and more effective than traditional methods.
Ready to upgrade your grill maintenance routine? The Grill Daddy Pro with SAFE BRISTLE-LOCK technology combines powerful steam cleaning with durable construction and a lifetime warranty.
Frequently Asked Questions
Can you steam clean a grill without damaging the grates?
Yes. Steam cleaning is safe for all grate types, stainless steel, ceramic, and cast iron. The steam softens and lifts grease and residue without the abrasive scraping of wire brushes or harsh chemicals. The key is using the right pressure and technique. Always preheat the grill first so the grates are hot enough for steam to work effectively, and never use excessive force when scrubbing.
Should grill grates be hot before steam cleaning?
Yes. Preheat your grill to medium-high heat for 10-15 minutes before you begin. Hot grates help the steam penetrate burned-on food and grease more effectively. The heat also allows water to convert to steam more efficiently as it contacts the surface, giving you better cleaning power and faster results.
What makes steam cleaning better than wire brushes or chemical cleaners?
Steam cleaning eliminates loose bristles that can fall into food, requires no harsh chemicals or toxic fumes, and works on all grate materials without damage. It sanitizes by breaking down grease on contact and reaching areas wire brushes cannot. There's no bucket, no mess, and no chemical residue left behind, just clean grates ready for cooking.
Do you need to rinse grill grates after steam cleaning?
No rinsing is necessary. Steam cleaning leaves only water and melted residue on the grates. Once you finish, wipe down the grates with a clean cloth or paper towel to remove any remaining debris, then run the grill at high heat for a minute or two to dry completely before cooking.


